
Bank Transaction – CSV Method
Table of Contents
Create Bank Rules
Bank Rules allow you to automate the processing of recurring or similar bank transactions.
You can create rules based on description, reference or amount in your bank statement. During the import process, Cloud Accounting checks each transaction against the defined rules. If a transaction matches the specified conditions—whether it is an exact match, partial match, or starts with (based on the configured matching method)—the system automatically assigns the corresponding G/L Account, Description, and Journal Type.
1. To create Bank Rules, go to Accounting > Bank Transaction. Click “Bank Rules”.
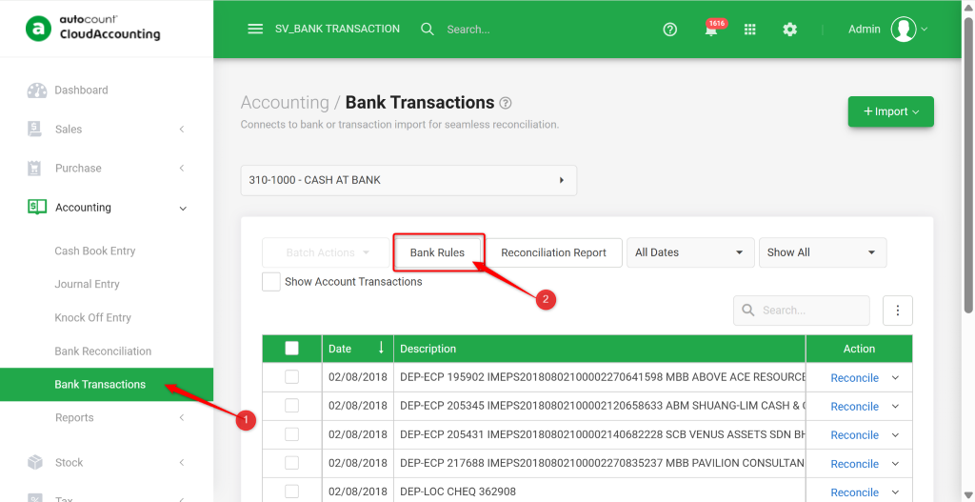
2. Click “+New” to create a new bank rule.

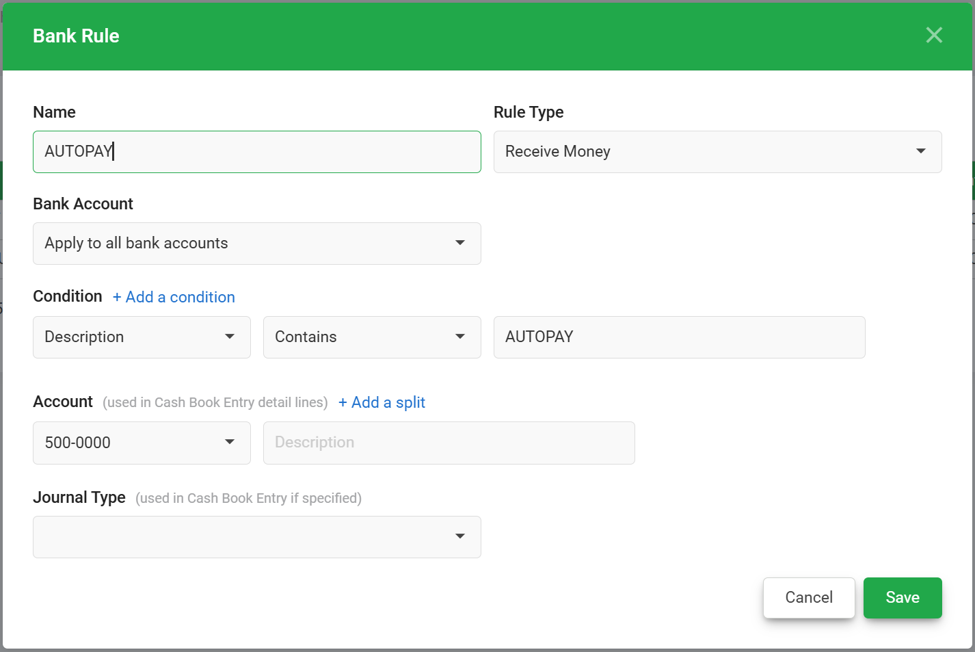
Fields:
Name: Enter a name for the bank rule.
Rules Type: Select the rule type “Spend Money” or “Receive Money”.
Bank Account: Select to “Apply to all bank accounts” or “Apply to selected bank account(s)”. If “Apply to selected bank account(s)” is selected, tick the banks you want to apply the bank rules.
Condition: Select the condition between “Description”, “Reference” or “Amount”.
Account: Select the GL code for Cash Book Entry detail lines.
Journal: Select the Journal type.
3. Click “Save” to commit the changes once completed or edit the required information.
Apply Bank Rules
Bank Rules are automatically applied when bank transactions are imported into Cloud Accounting. During the import process, the system checks each transaction against the defined bank rules. If a transaction matches the specified conditions, the corresponding G/L Account, Description, and Journal Type are assigned automatically.
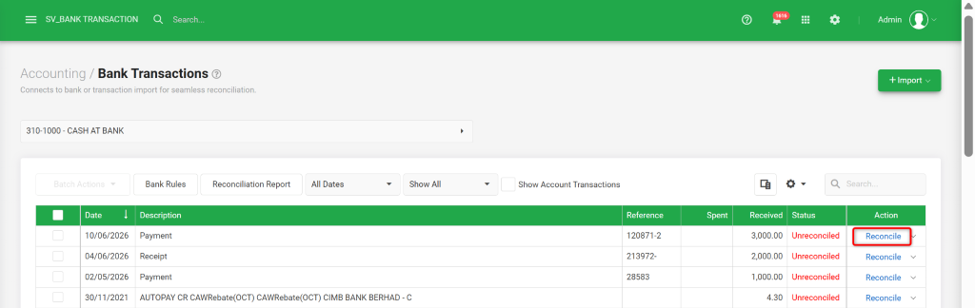
1. Click “Reconcile” at the right side of the bank transaction.
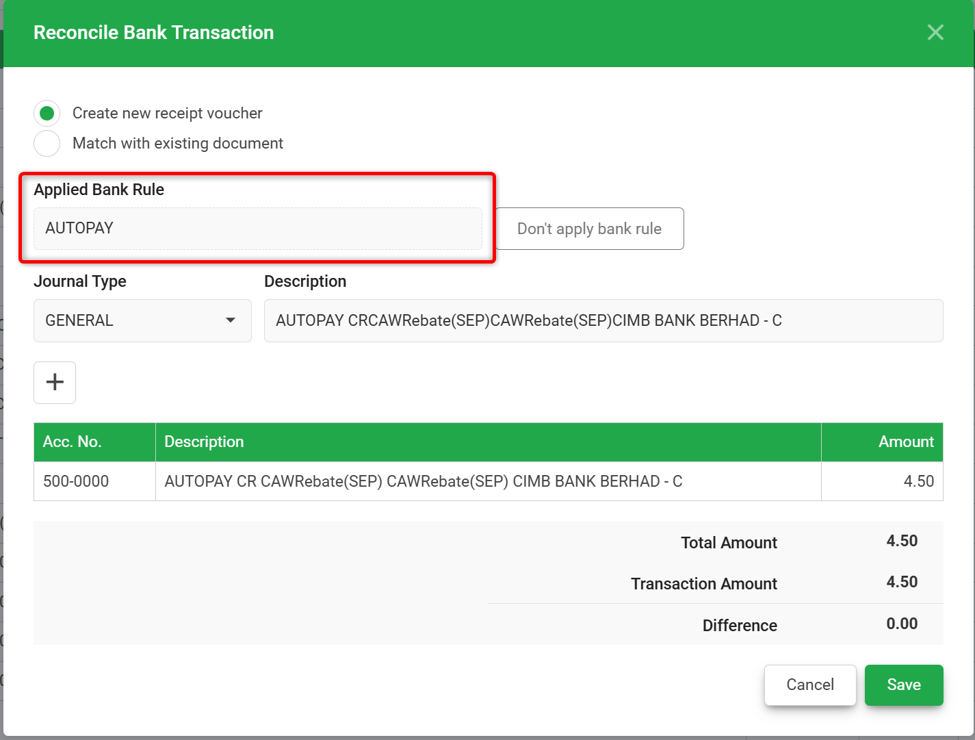
2. The bank transaction will be assigned with the bank rules set. Click “Save” if there is no amendment needed.
3. The bank transaction will be successfully reconciled.
Import Bank Transaction
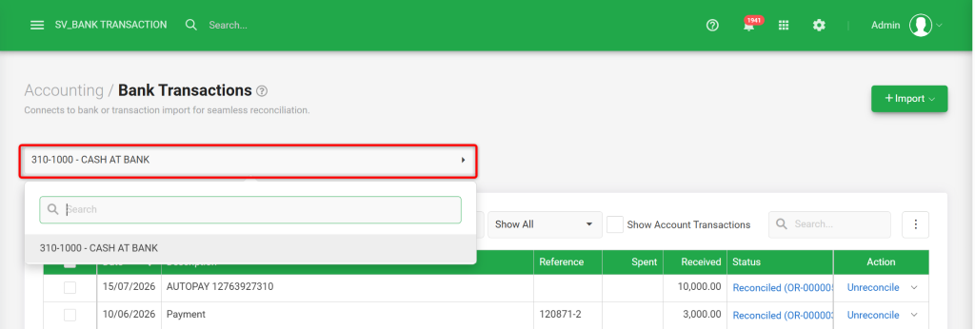
Before importing bank transactions, select the bank account you wish to reconcile.
There are two methods available to import bank transactions:
- CSV File: Import transactions from bank statements provided in CSV format.
- Bank Statement: Import transactions directly from PDF bank statements. This supports CIMB Bank, RHB, BSN, and Public Bank.
Method: CSV File
Refer to the following steps to import bank transactions using your preferred method:
1. Select the bank account you wish to reconcile.
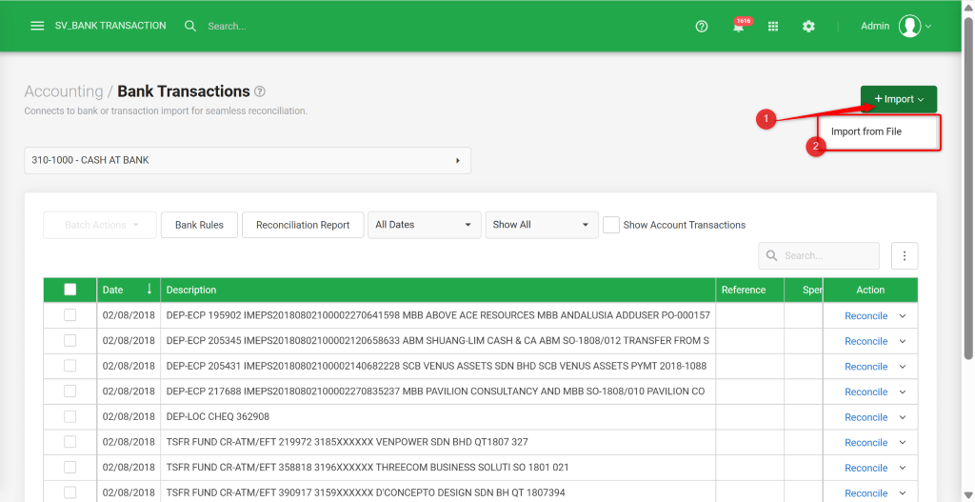
2. Click “+Import” > “Import From File”.
3. Select the CSV as the file format.
4. Click Select File, select the CSV document and click “Open”.
5. Click “Import”.
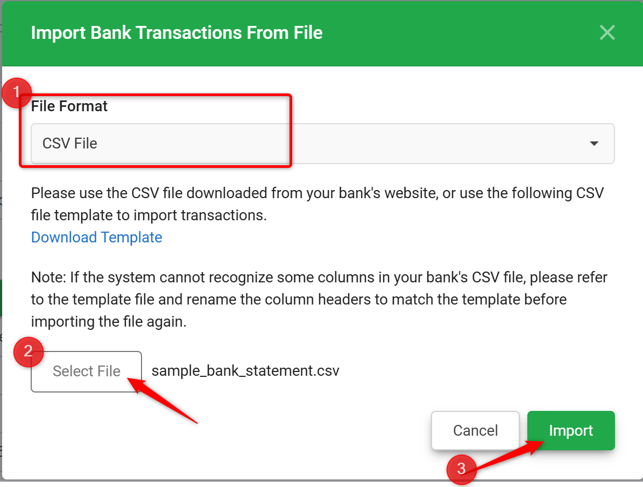
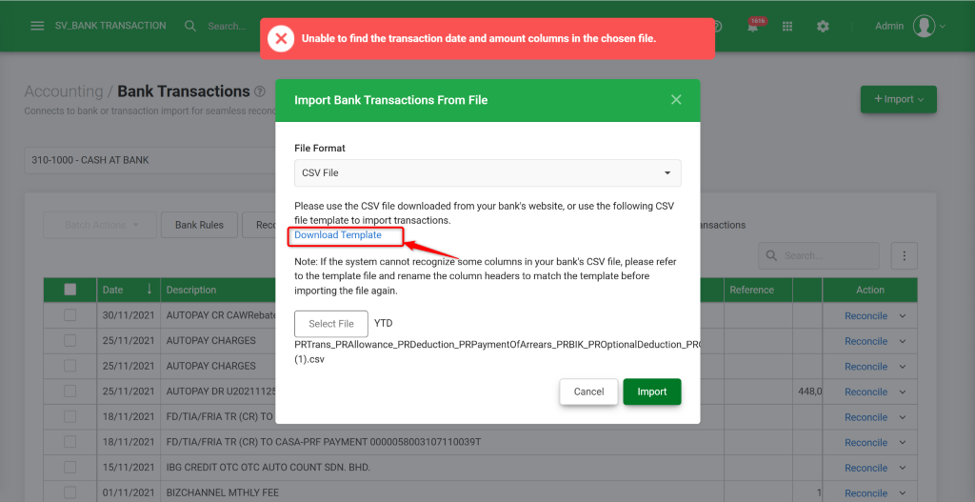
Note: If the error "Unable to find the transaction date and amount columns in the chosen file." appears when importing a CSV file, please download the template file (click ‘Download Template’) and refer to the template file’s header and rename your CSV file’s column headers to match the template before importing the file again.
Perform Bank Reconciliation
Scenario 1: Create new Receipt Voucher or Payment Voucher
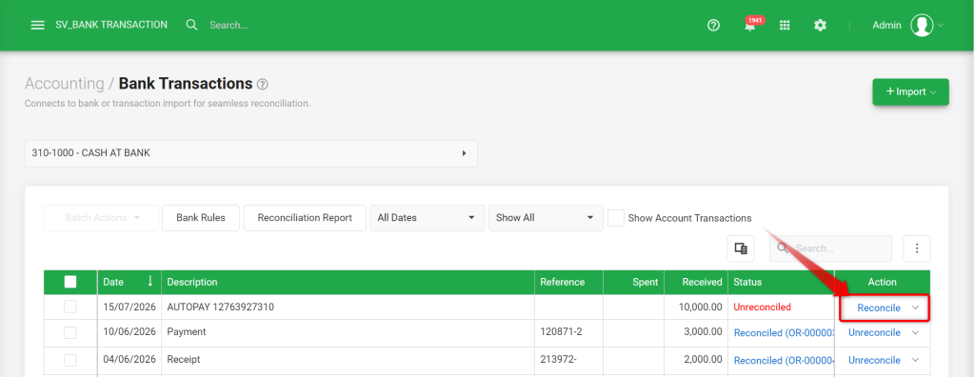
1. Click “Reconcile” on the right side of the bank transaction you wish to reconcile.
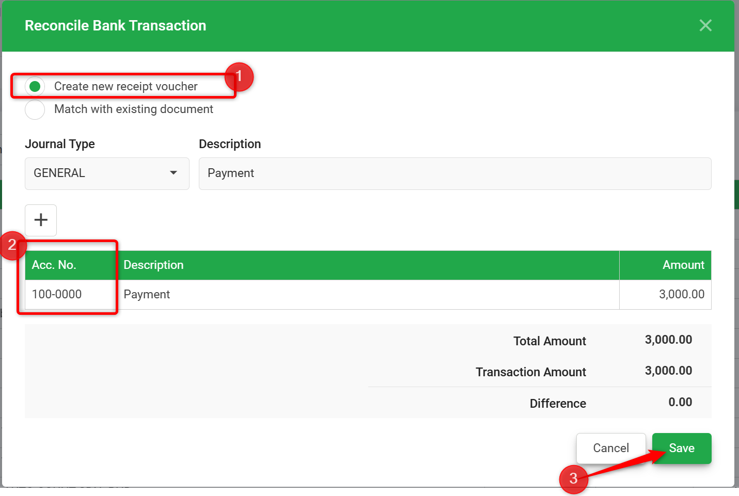
2. A Reconcile Bank Transaction will appear. Select “Create new receipt voucher”, then assign the Acc. No., select Journal Type (if applicable) and amend the Description (if needed).
3. Click “Save”.
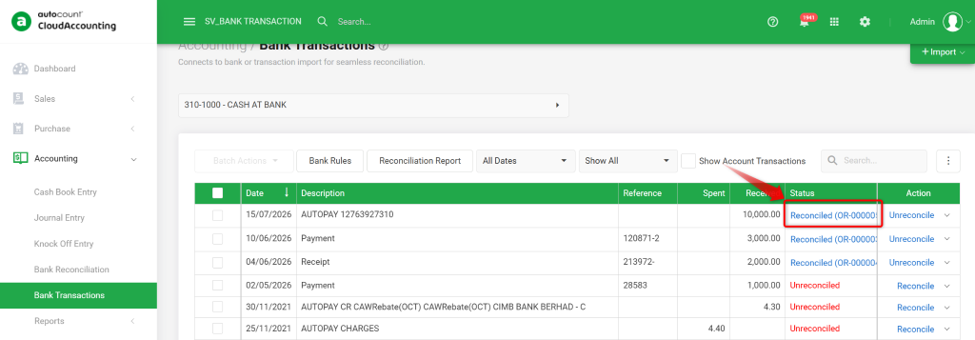
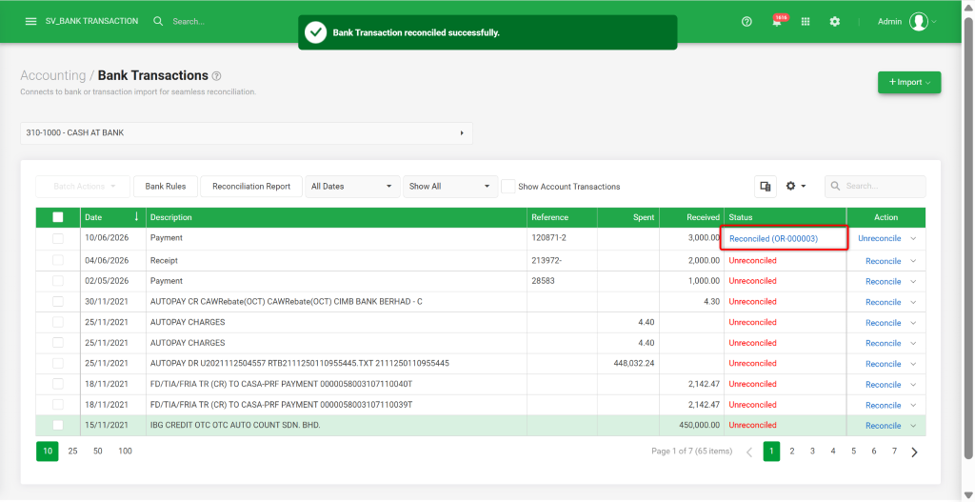
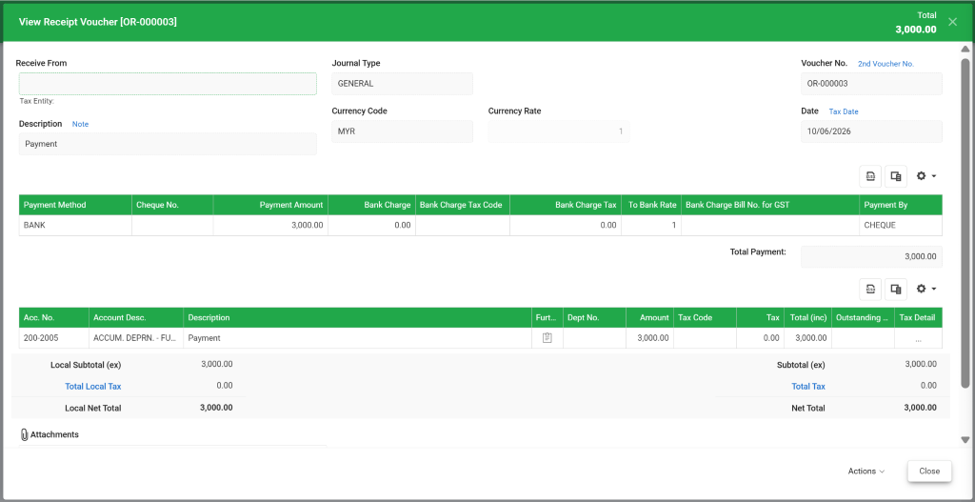
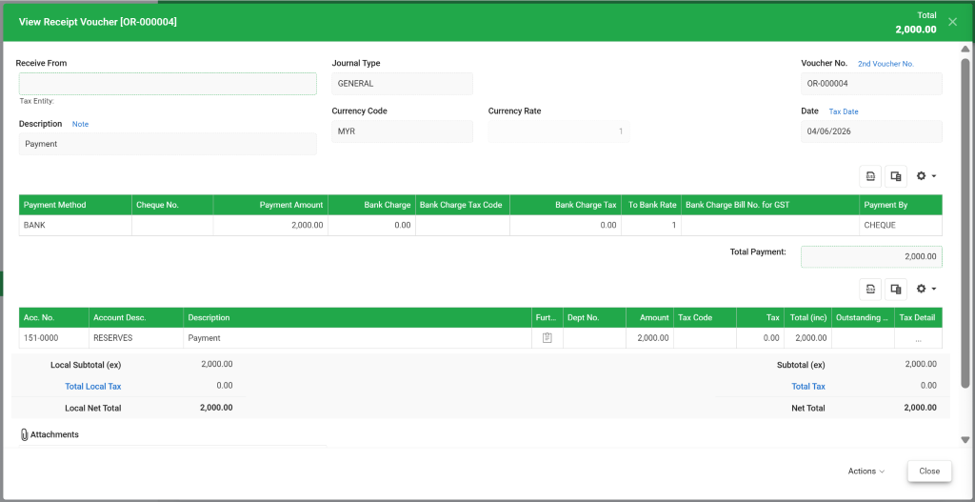
4. The transaction status will change to “Reconciled (Document No.)”. Click the document number to view the newly created voucher.
Scenario 2: Match with Existing Document
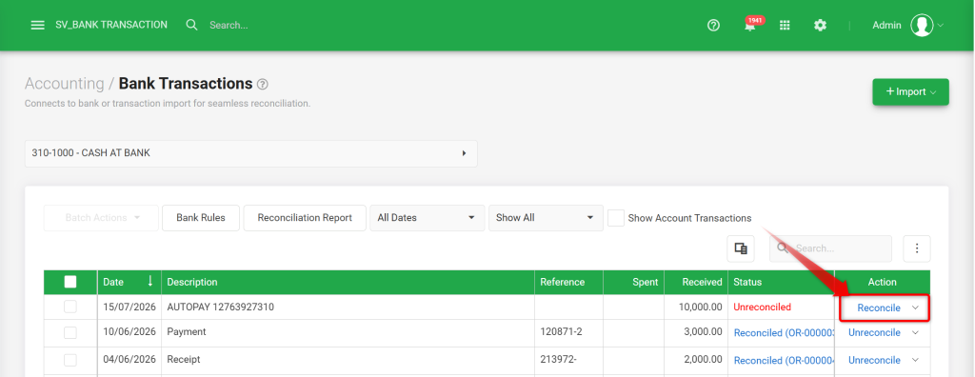
1. Click “Reconcile” on the right side of the bank transaction you wish to reconcile.
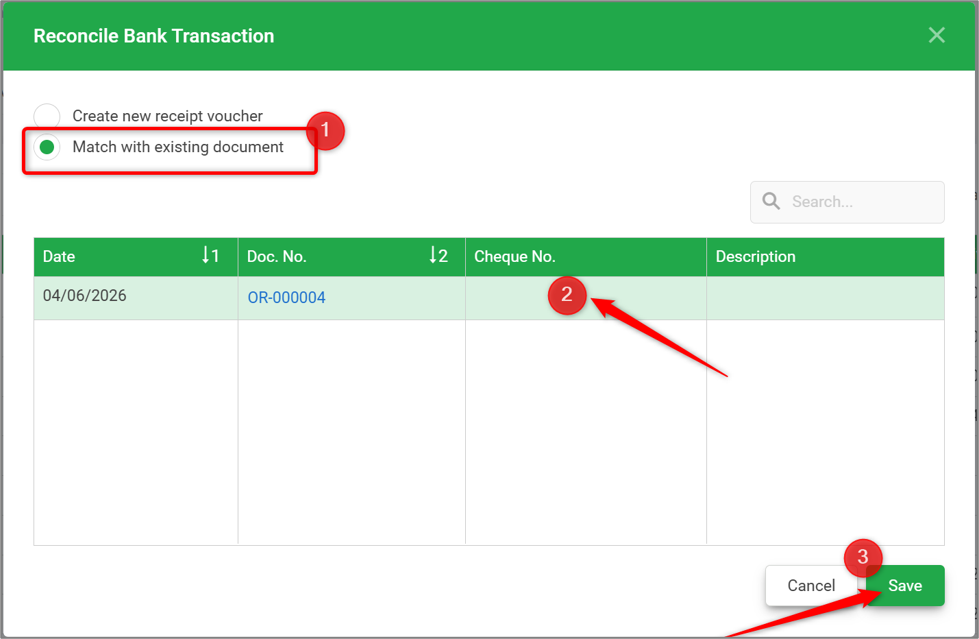
2. The Reconcile Bank Transaction window will appear. Select “Match with existing document” and select the existing transaction to match with the reconciliation. The document must meet the following conditions:
- The voucher date must be earlier than or equal to the bank transaction date.
- The transaction amount must match the bank transaction amount.
* Invoice using Bank in “Payment Amount” will also show out in the listing for reconciliation.
3. Click on the document number to view the transaction. Click “Save” to proceed.
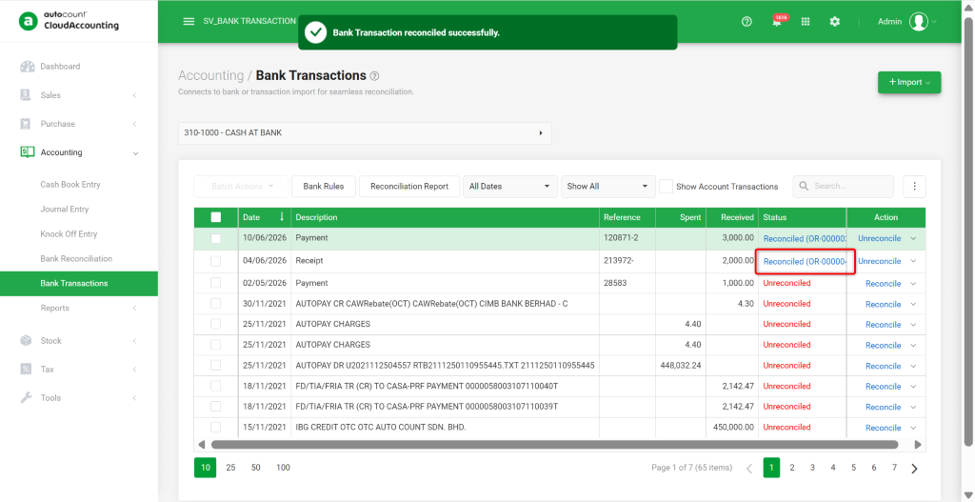
4. The transaction status will change to “Reconciled (Document No.)”. Click the document number to view the newly created voucher.
Prepared by Rui Harn & checked by Seck Voon 260716