
Search terms: import product excel, import customer excel, import supplier excel, import chart of account excel, bulk import master data, AutoCount Excel import template
Overview
Product, Customer, Supplier, and Chart of Account records can be created or updated in bulk using dedicated Excel templates, instead of entering each record manually. This is useful when setting up a new company, migrating data from another system, or updating multiple existing records at once.
The import steps are the same across all four modules; only the template's column names and preview table columns vary.
Applies To
This guide applies to importing data:
- Product (Master Data > Product)
- Customer (Master Data > Customer)
- Supplier (Master Data > Supplier)
- Chart of Account (Master Data > Chart of Account)
Steps
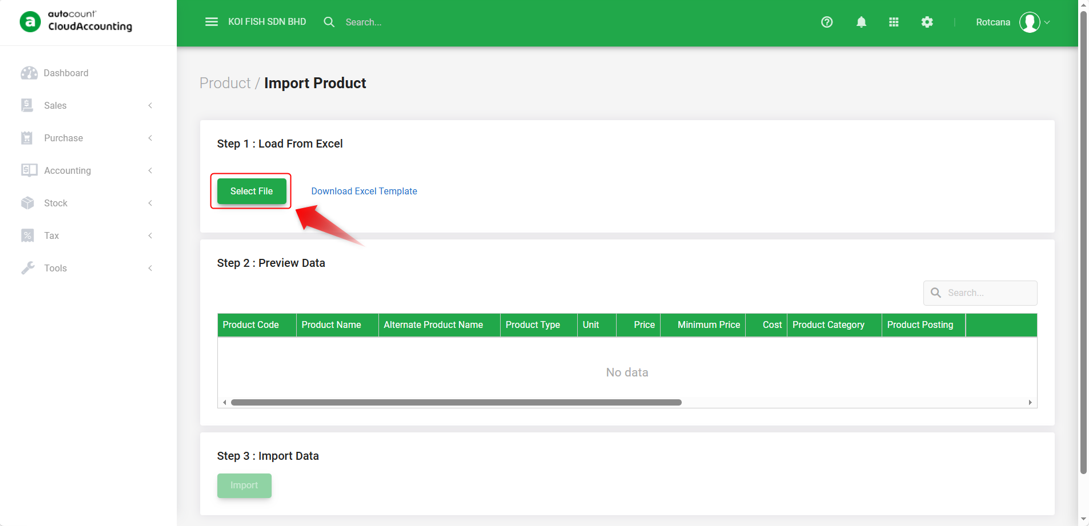
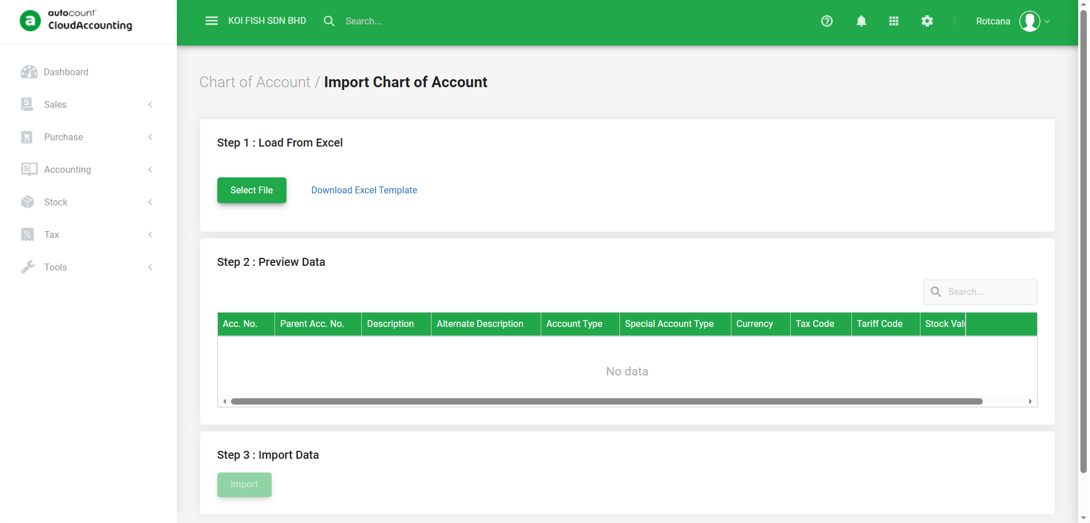
The screenshots below demonstrate the Import Product screen.
Customer, Supplier, and Chart of Account use the exact same screen layout; only the column names differ.
Step 1: Open the Import Function
1. Navigate to the relevant module (Product, Customer, Supplier, or Chart of Account).
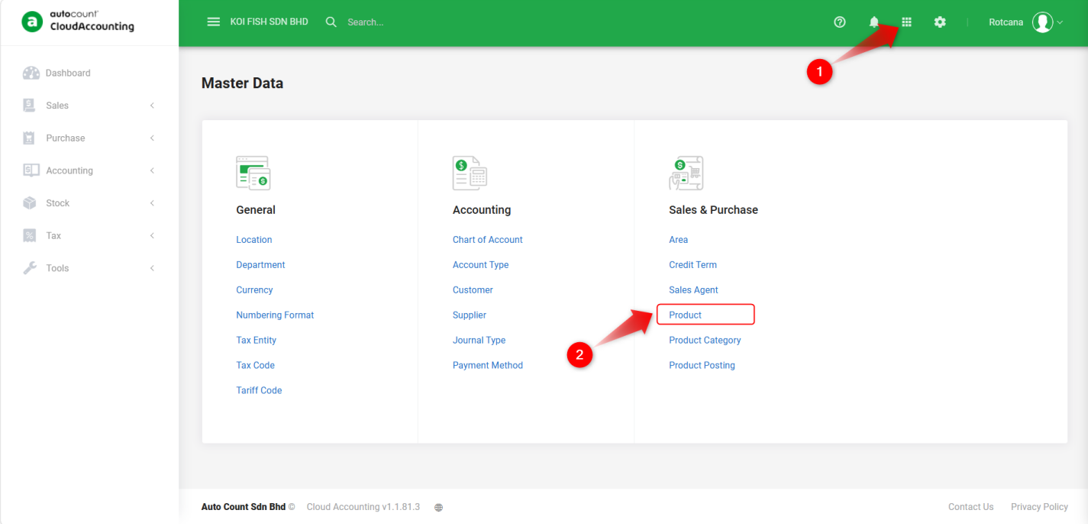
2. Click the Import Data icon. This opens the Import screen, which contains three sections: Load From Excel, Preview Data, and Import Data.
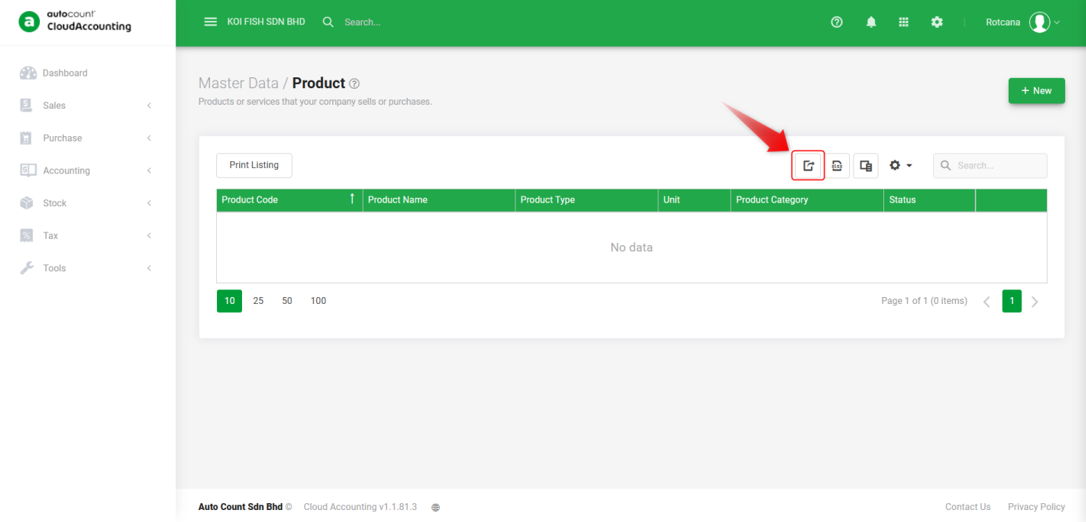
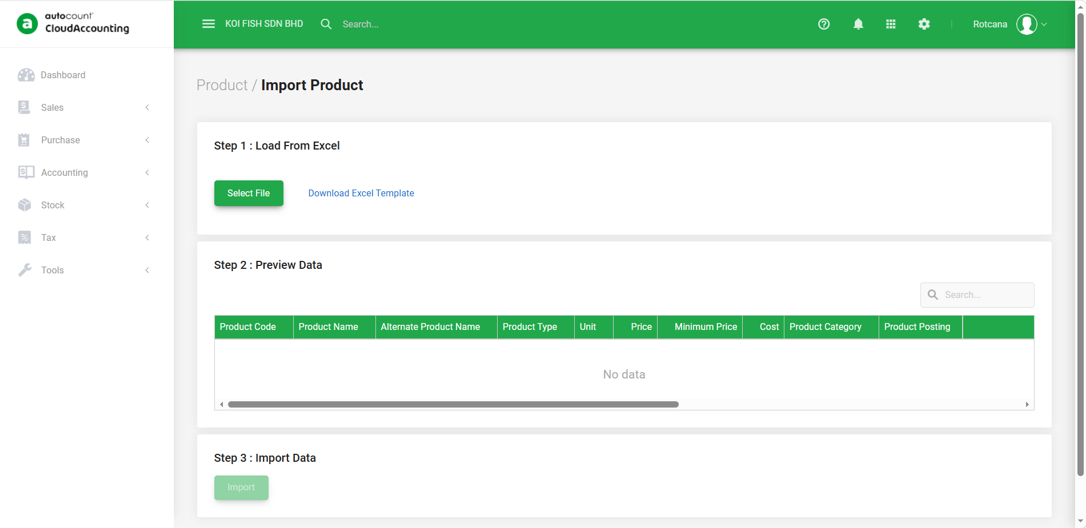
Step 2: Download and Fill in the Excel Template
1. Click Download Excel Template to save the import file for the module.
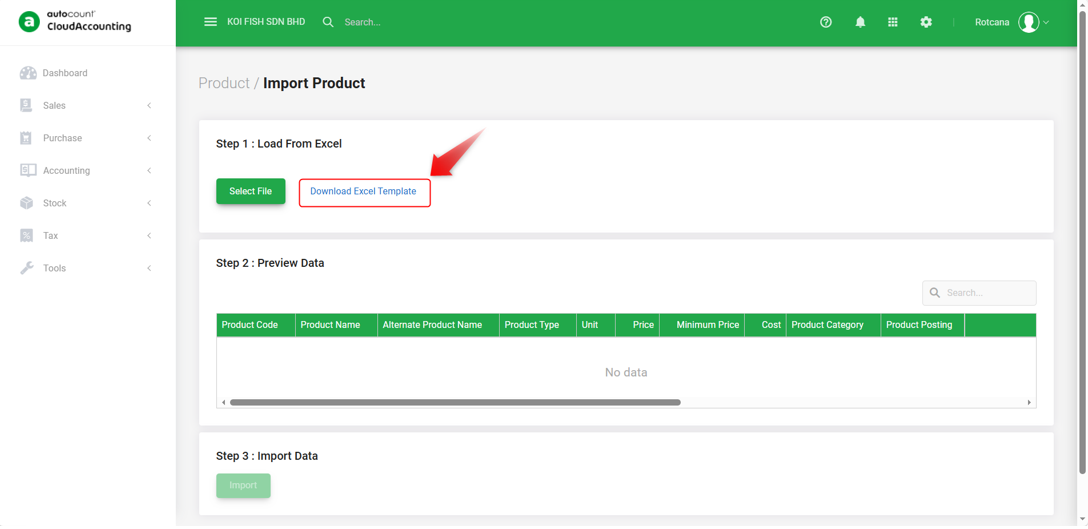
2. The downloaded file contains two sheets:
Template: The primary sheet where you input your data. Each column corresponds to a specific system field.
Guide: Explains each column, including Column Type, Description, Required status, and Sample Data.
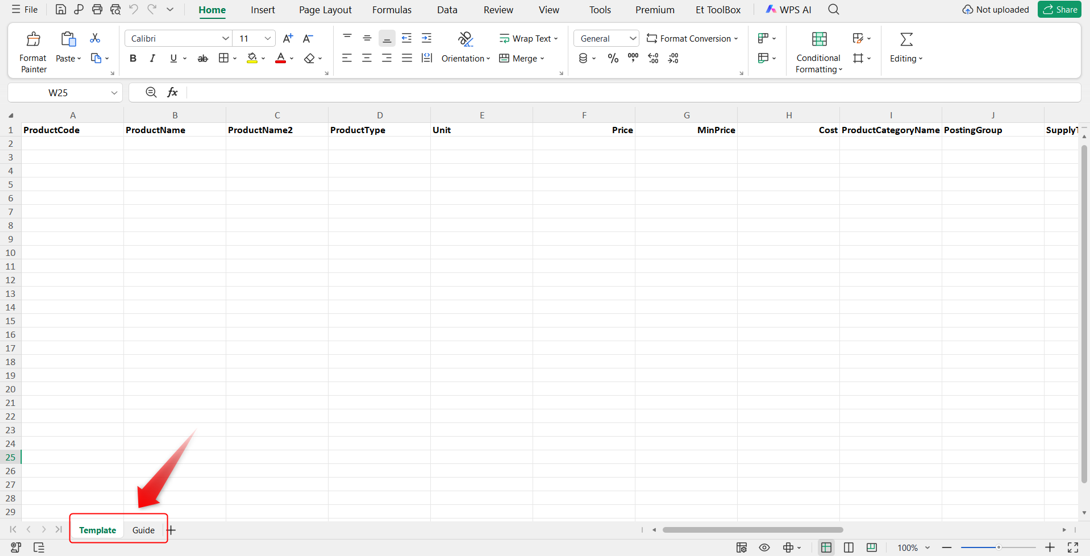
3. Fill in the Template sheet using the Guide sheet for reference. Required columns must be completed for the records to import successfully.
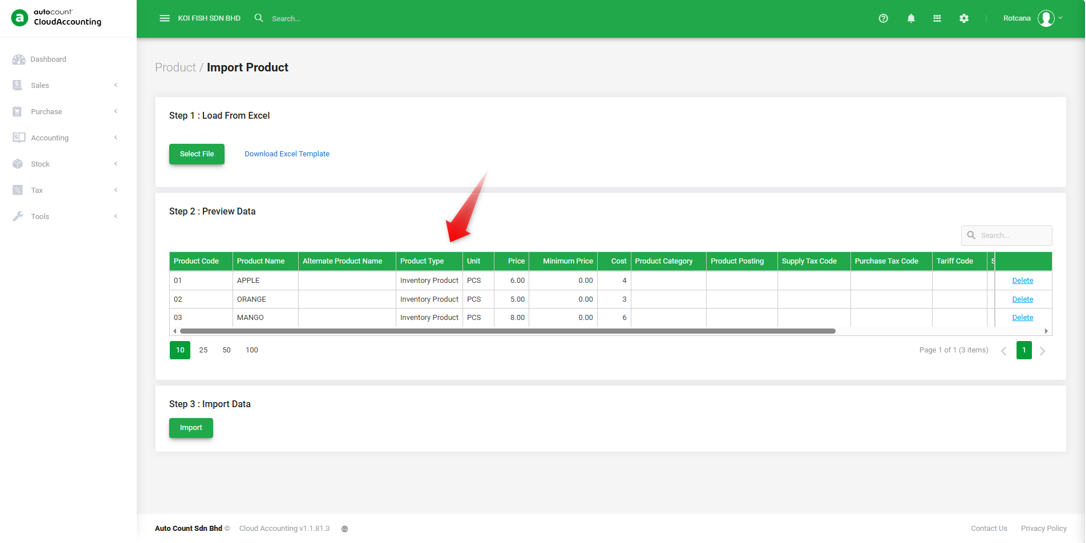
Note: The Excel Template uses internal field names (for example, "AccNo," "CompanyName"), whereas the Preview Data screen displays standard labels (for example, "Customer Code," "Company Name"). Both refer to the same underlying fields.
Step 3: Select File and Preview
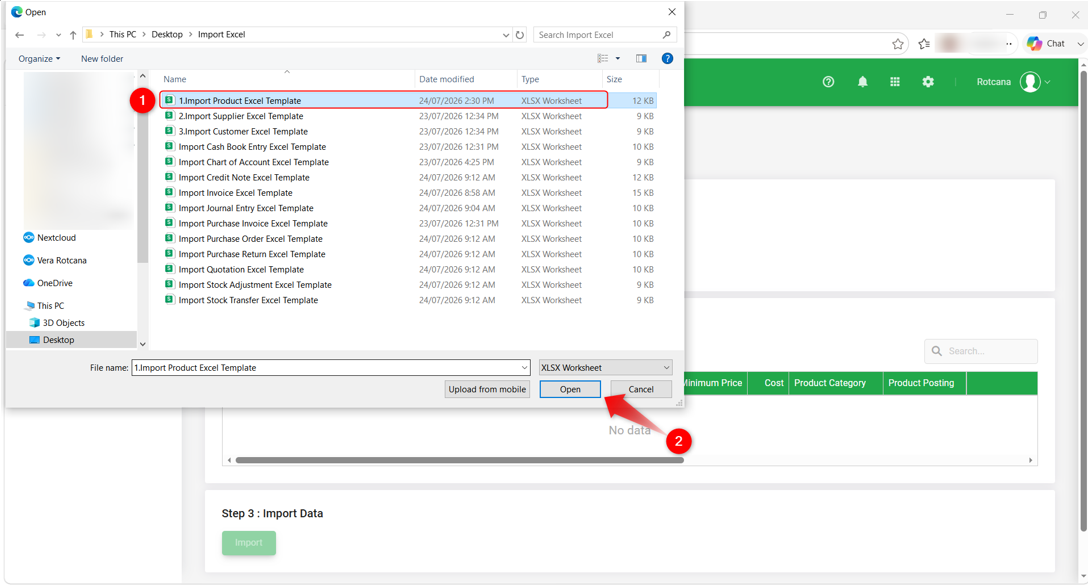
1. Click Select File and choose your completed Excel file.
2. Review the data displayed in the Preview Data table to verify that the file was read correctly.
Step 4: Import Data
1. Click Import to create or update the records.
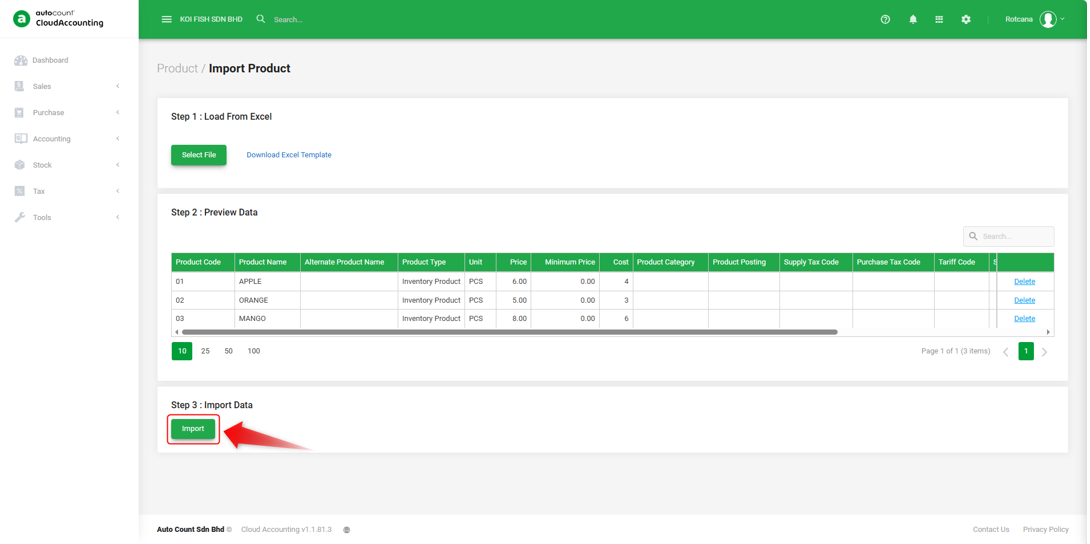
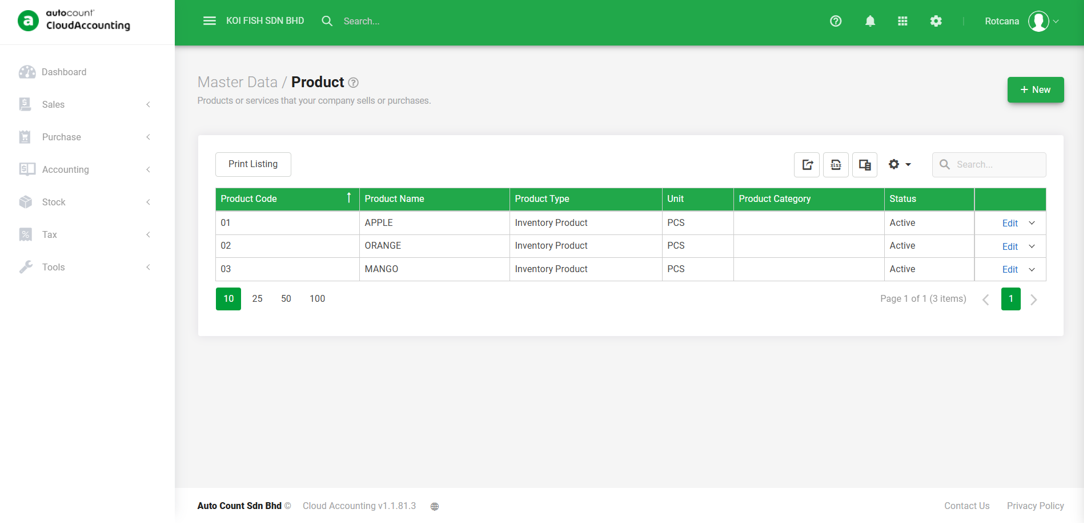
2. Once the import is complete, check the module listing to confirm that all records were created or updated as expected.
Screenshots by Module
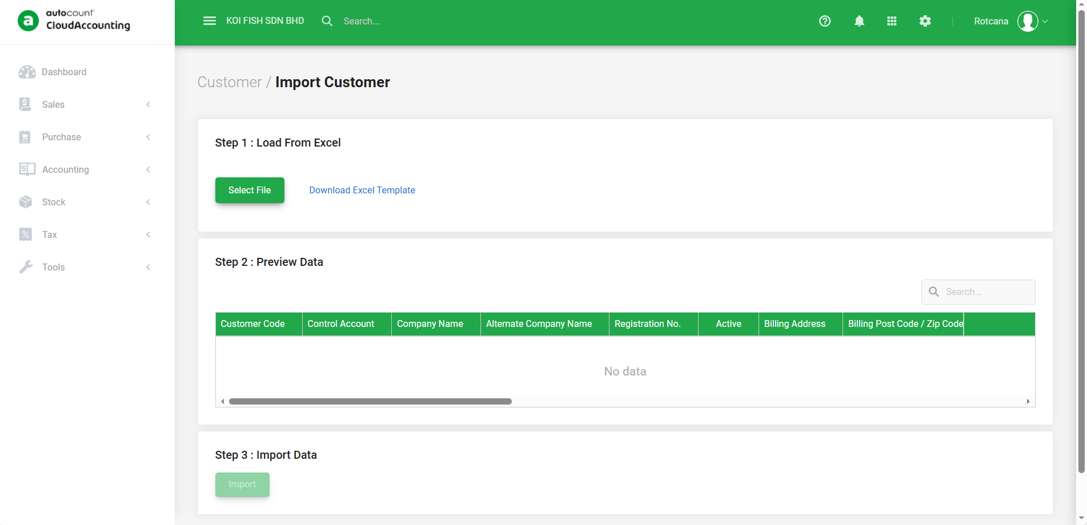
Import Customer
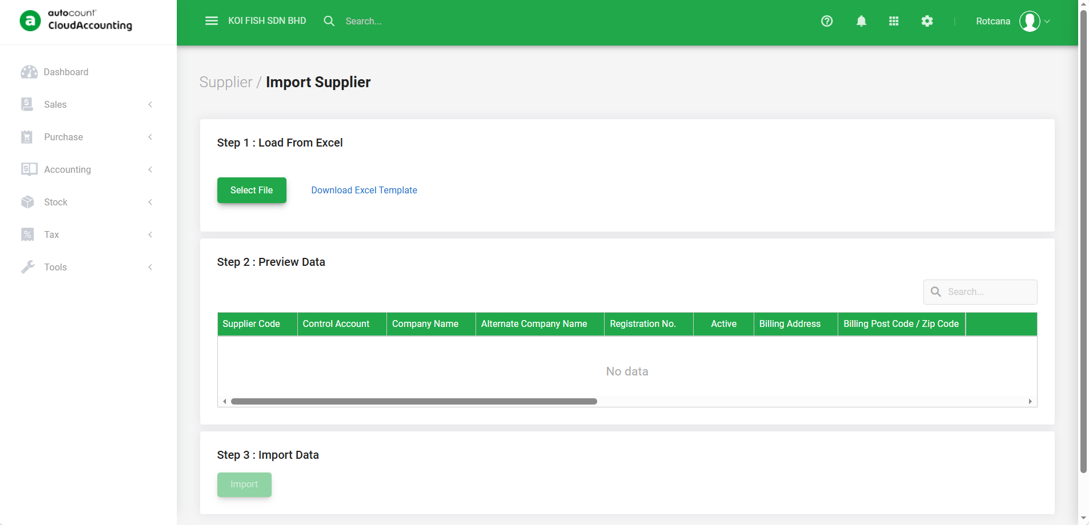
Import Supplier
Import Chart of Account
Required Fields by Module
Product : ProductCode, ProductName, ProductType (I = Inventory Product, N = Non-Inventory Product, S = Service Product), Status (A = Active, I = Inactive, D = Discontinued)
Customer : AccNo (Customer Code), ParentAccNo (Control Account), CompanyName, IsActive, CurrencyCode, CreditTerm
Supplier : AccNo (Supplier Code), ParentAccNo (Control Account), CompanyName, IsActive, CurrencyCode, CreditTerm
Chart of Account : AccNo (Account No.), AccType (Account Type)
All other columns in each template are optional and can be left blank if not required.
Chart of Account: Special Account Type Codes
When filling the SpecialAccType column for Chart of Account, use the following codes:
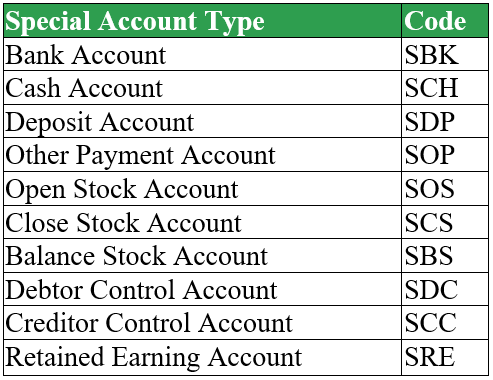
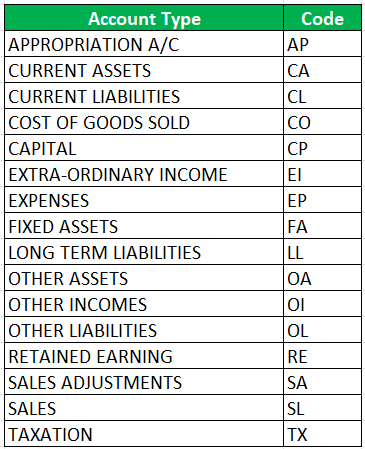
Chart of Account: Account Type Codes
When filling the AccType column for Chart of Account, use the following codes:
Note: The StockValueLink column is used only when creating new stock accounts. Enter the same value for a group of related stock accounts (open stock, close stock, balance stock) to link them together as one set.
Updating Existing Records
The import function can also be used to update existing records in addition to creating new ones.
To update only specific fields only:
- Open the Template sheet and delete any columns you do not wish to modify.
- Retain the primary identifier column (ProductCode for Product; AccNo for Customer, Supplier, and Chart of Accounts).
- Keep only the specific column(s) you intend to change.
Example: To update a product's name without altering other details, include only the ProductCode and ProductName columns in the Template sheet.
By: Rotcana 260818, Lay Swan 260831