
TABLE OF CONTENTS
5. InvoiceNow Setup in AutoCount Cloud Accounting
Introduction
InvoiceNow allows users to send and receive e-Invoices, as well as submit invoice data to IRAS for GST InvoiceNow requirements via DataPost Pte Ltd, a certified Peppol Access Point and IMDA InvoiceNow-ready solution provider in Singapore.
To start using InvoiceNow with AutoCount Cloud Accounting, you will first need to register for a Peppol ID.
Please contact your sales consultant to register your Peppol ID. Alternatively, you may email us at sales.sg@autocountsoft.com, and our team will guide you through the registration process.
1. DataPost Portal Activation
Once your Peppol ID has been successfully registered, you will receive two separate emails from DataPost at the email address provided during registration. One is the Activation Email, which will be used to activate and setup password for your account in the DataPost portal, while the other is the Authorization Email, which is used to authorize CorpPass.
After completing the DataPost Account activation and authorizing CorpPass, you can proceed with the InvoiceNow setup in AutoCount Cloud Accounting.
1.1. Open the activation email from DataPost in your inbox.
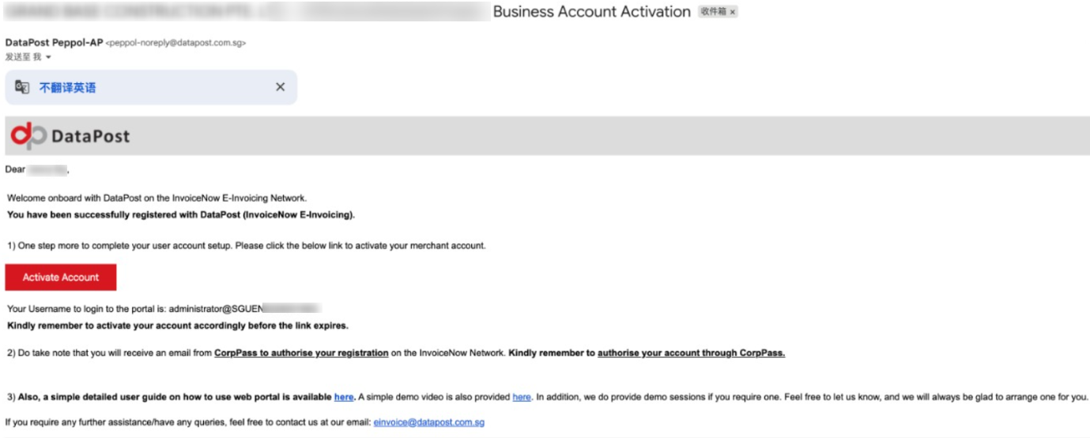
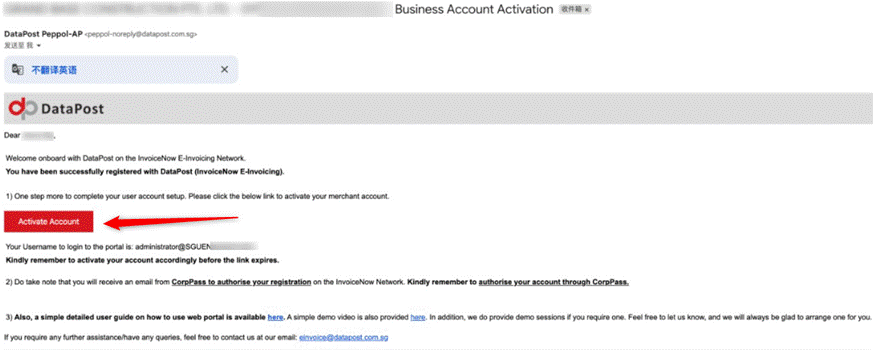
1.2. Click on the “Activate Account” button in the email.
1.3. Follow the instructions provided to set up your password and complete the account activation.
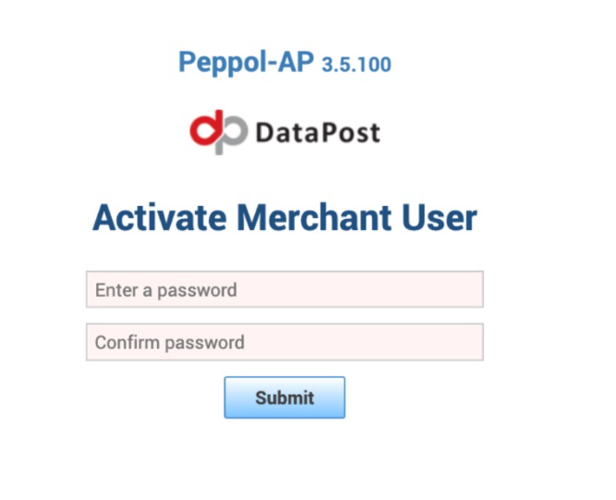
Note: Please complete the activation within 3 days. Otherwise, the activation link will expire.
2. CorpPass Authorization
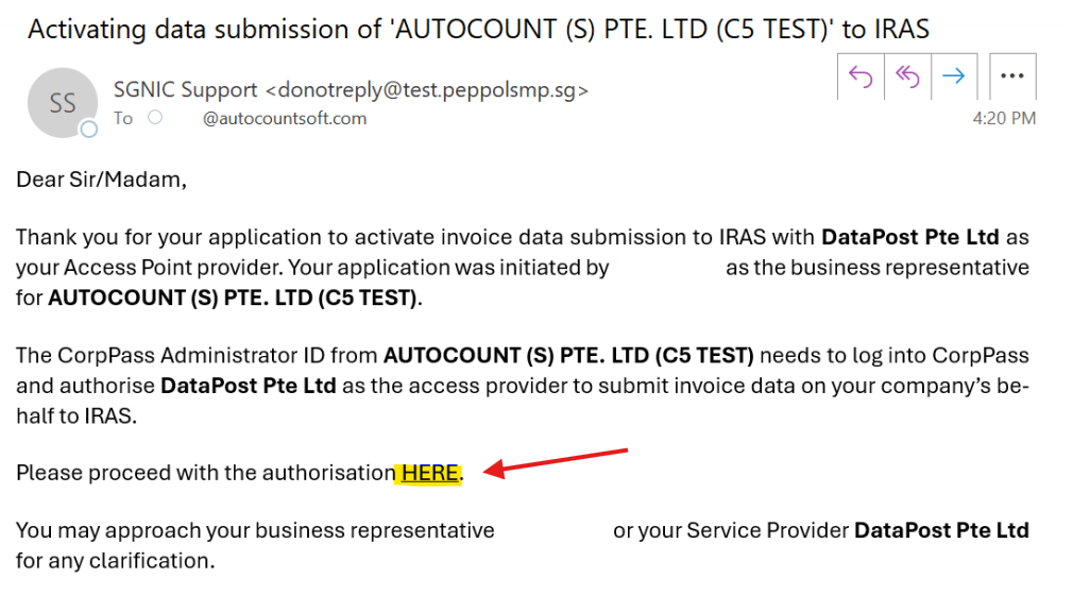
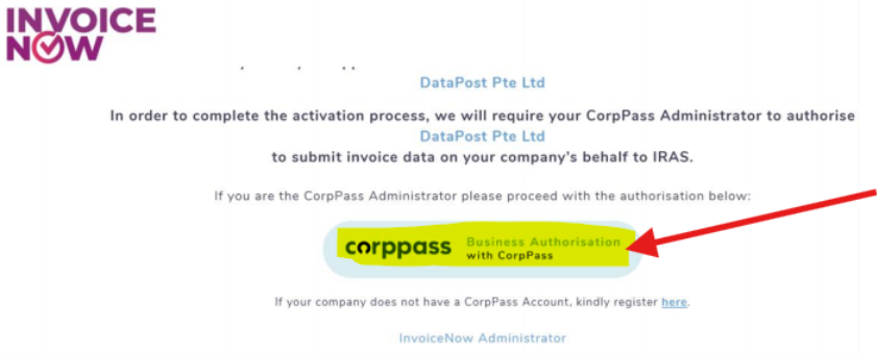
2.1. Open the authorization email from DataPost in your inbox.
2.2. Click on the “HERE” button with the blue font color, as highlighted in the screenshot below.
2.3. You will be redirected to the authorization webpage. Click on the “Authorization” button as highlighted in the screenshot below.
2.4. Scan the Singpass QR code using the Singpass app and complete the login process.
2.5. Follow the on-screen instructions to complete the CorpPass authorization.
3. Retrieve API Key
After completing the DataPost account activation and CorpPass authorization, proceed to the DataPost Portal to retrieve the API Key and generate the API Secret.
3.1. Log in to the DataPost Portal using the username provided in the DataPost email and the password that was set during the account activation process.
Login link: https://peppol.datapost.com.sg/app/auth/login
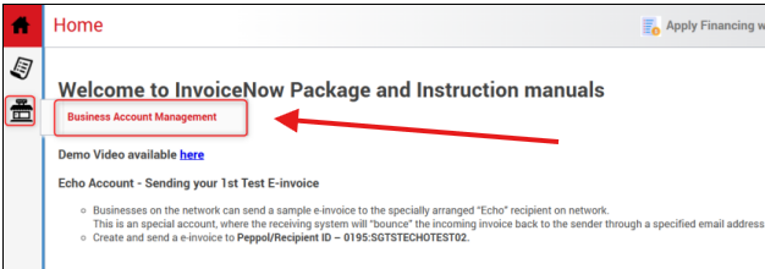
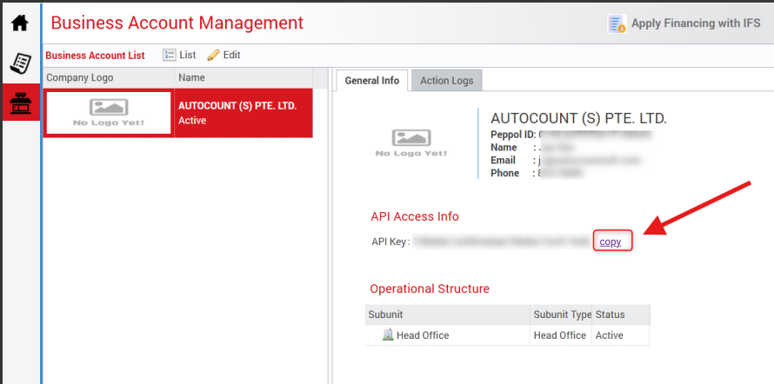
3.2. After logging in to the DataPost Portal, follow the steps below shown in the screenshot to locate and copy the API key.
On the Business Account Management page, there will be an API Access Info section. Click “Copy” to copy the API Key.
4. Generate API Secret
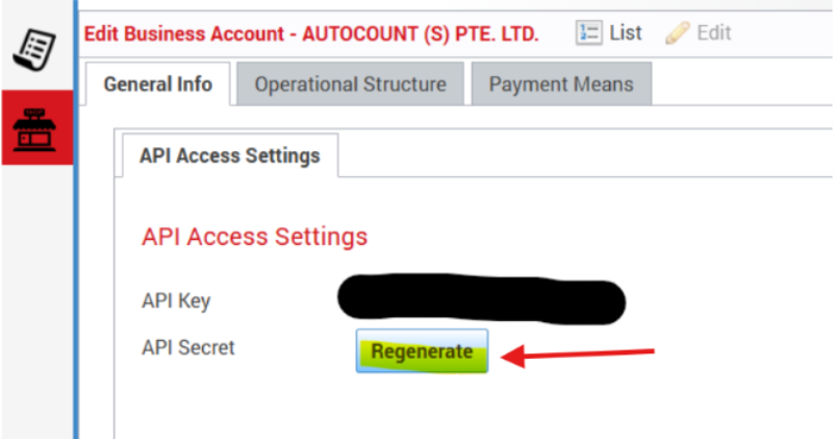
4. Follow the steps shown in the screenshot below to generate the API Secret. Select your company and click “Edit”, or double-click the company icon to open the company settings.
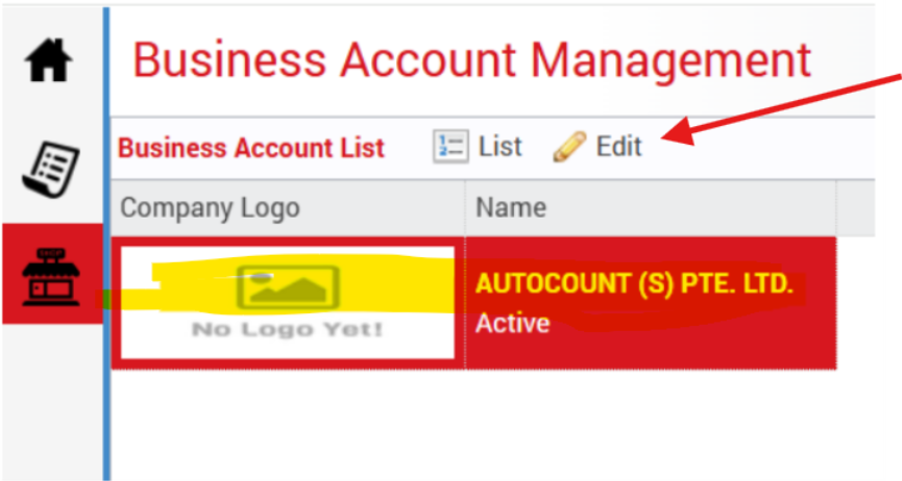
4.1 Scroll down and click Regenerate to trigger the API secret sent again to the registered email address. A Secret key will be emailed to your registered email account.
5. InvoiceNow Setup in AutoCount Cloud Accounting
After obtaining the API Key and API Secret from the DataPost Portal, proceed with the InvoiceNow setup in AutoCount Cloud Accounting.
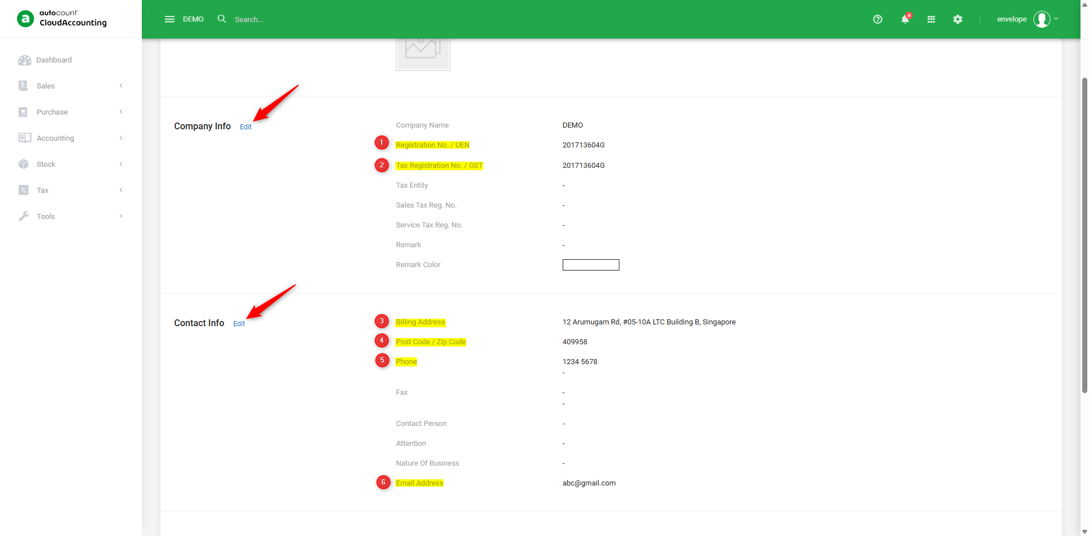
5.1. First, go to Company Profile and enter the required company information.
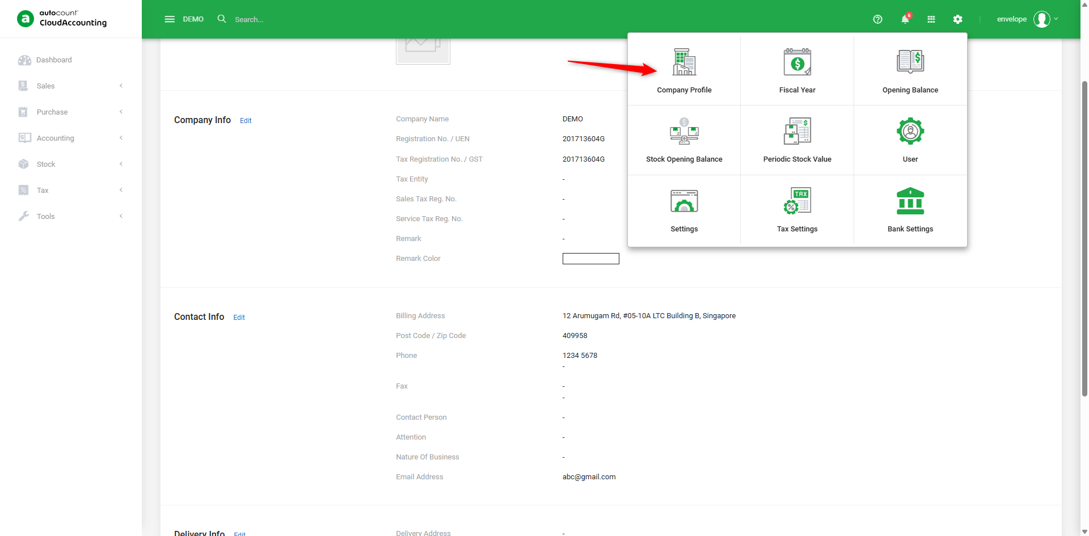
5.2. Go to setting > Company Profile > click on ‘Edit’ to enter your Company Information.
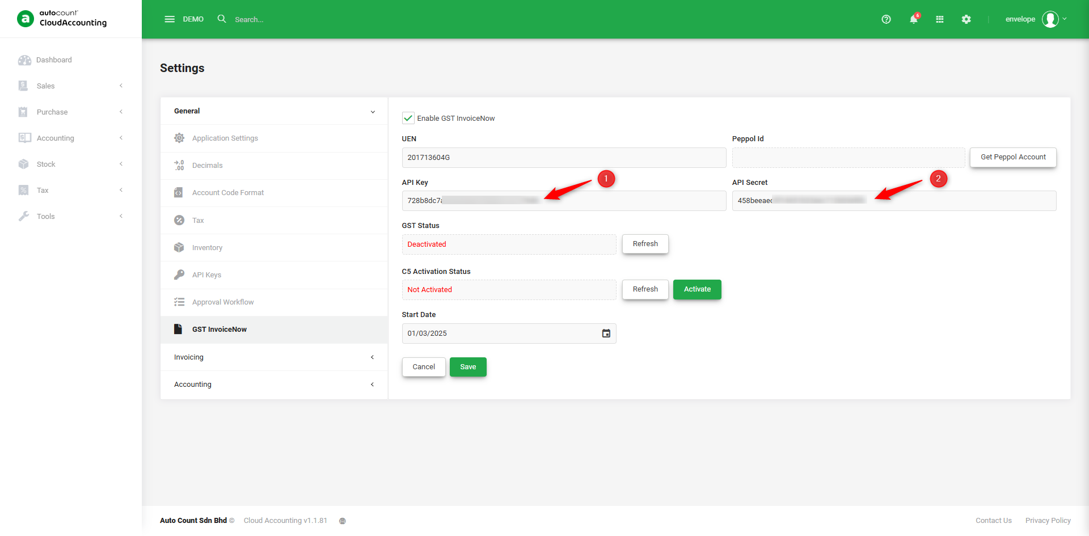
5.3 Next, you will need to enter API Credential. Navigate to Settings > GST InvoiceNow.
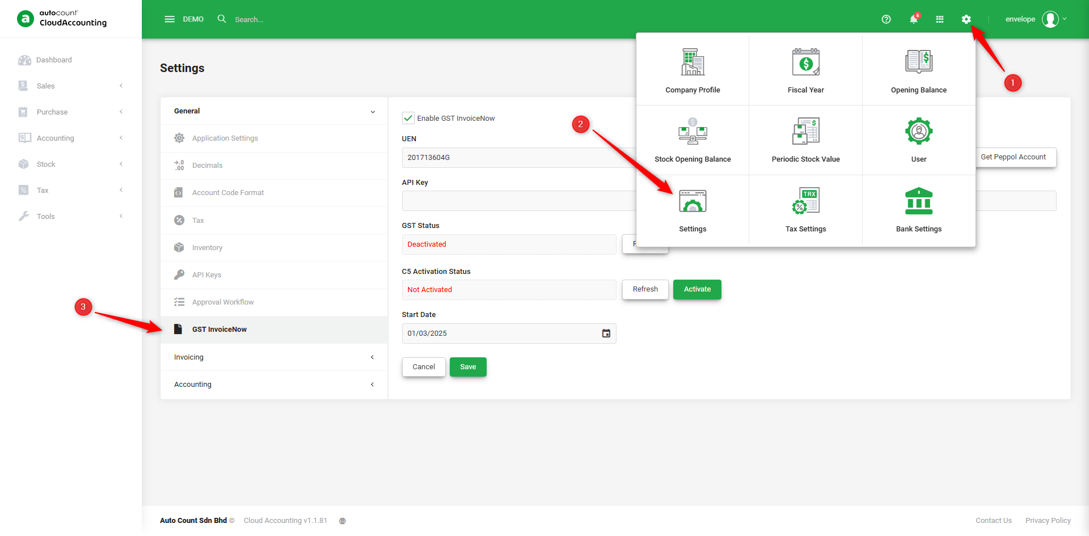
5.4. Copy and Paste the API Key and API Secret obtained from the DataPost Portal into the respective fields.
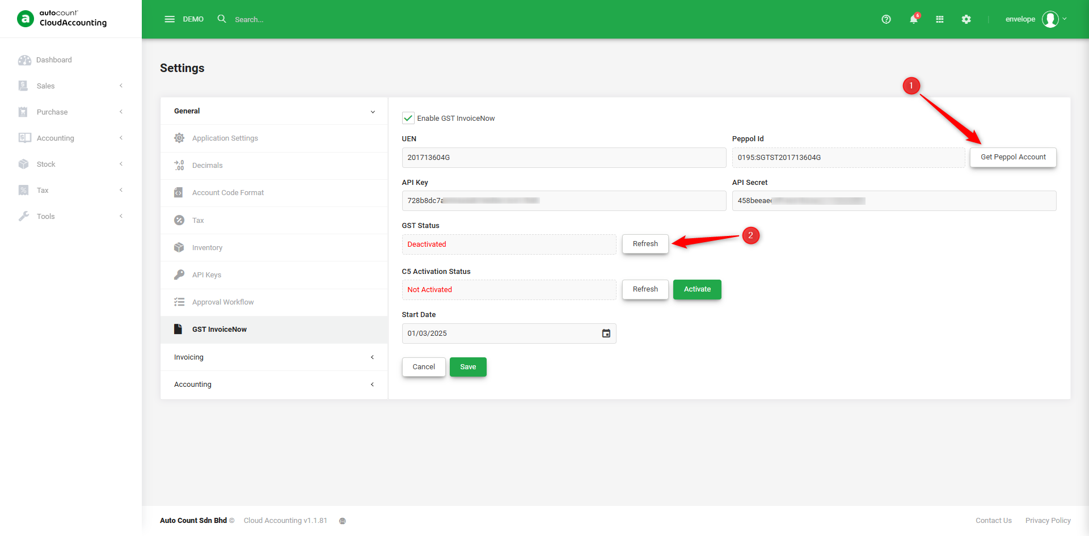
5.5. After entering the API credentials, click “Get Peppol Account” to retrieve your Peppol ID. Then, click the Refresh button beside GST Status to refresh the GST Status.
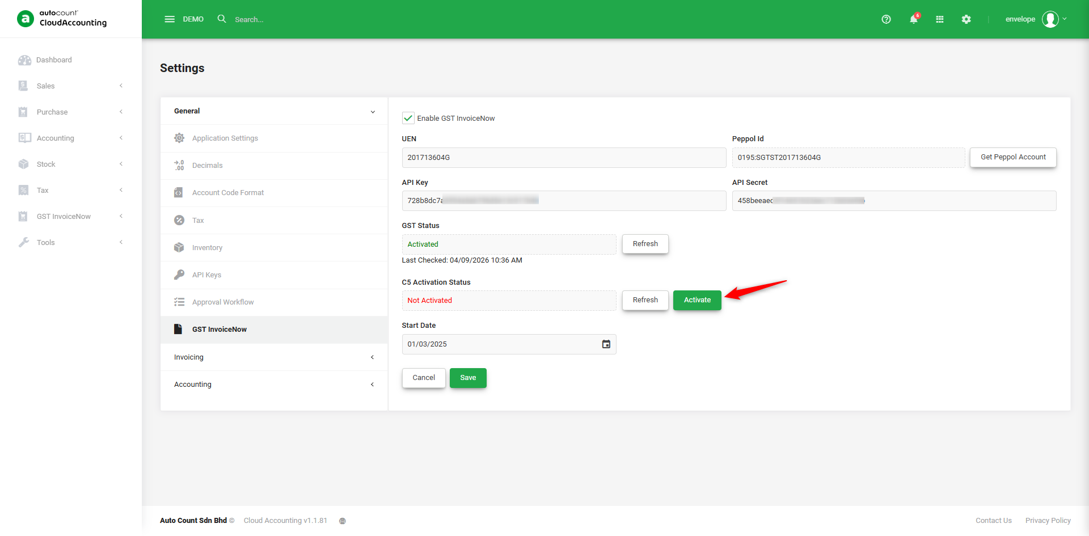
5.6. C5 Activation is required to enable for InvoiceNow submission to IRAS. Click “Activate” button beside C5 Activation Status and enter the PIC Name and PIC Email when prompted.
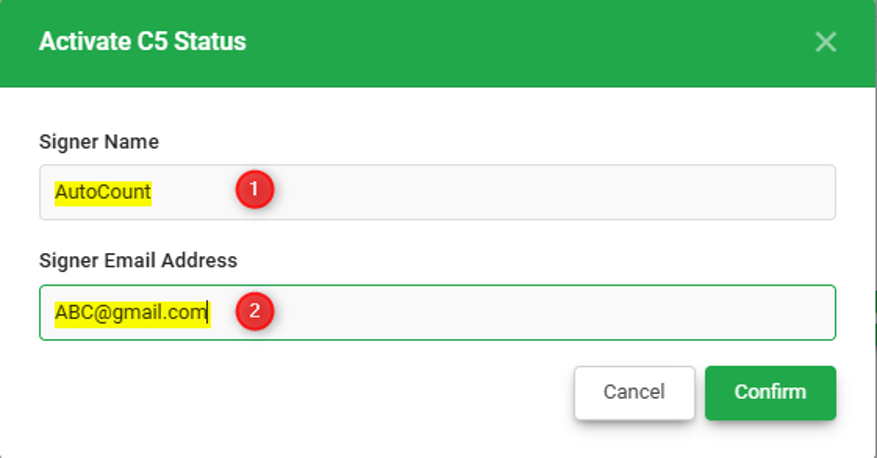
An authorization email will then be sent to the PIC email address provided. Next, check the email for the new DataPost authorization email.
5.7. Open the email and click on the “HERE” button. You will be redirected to the authorization page.
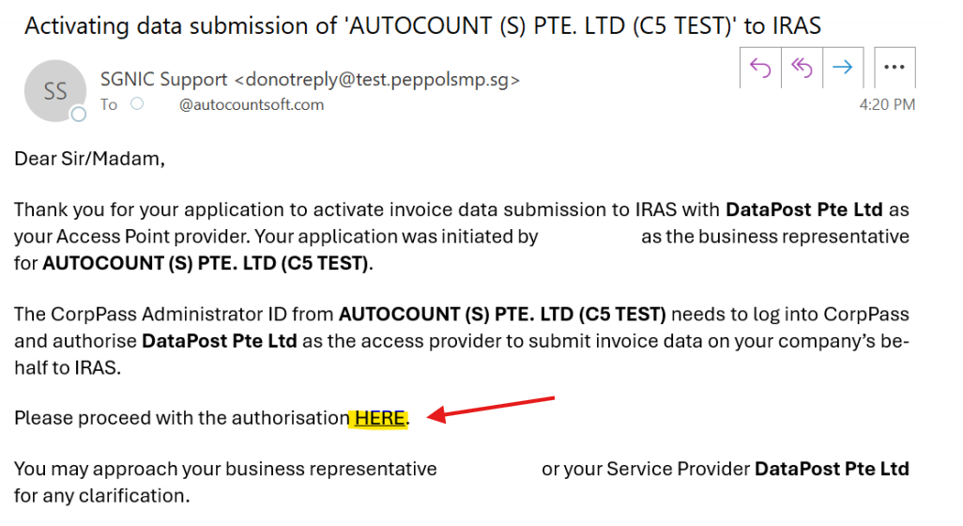
5.8. You will be redirected to the authorization webpage. Click on the “Authorization” button as highlighted in the screenshot below.
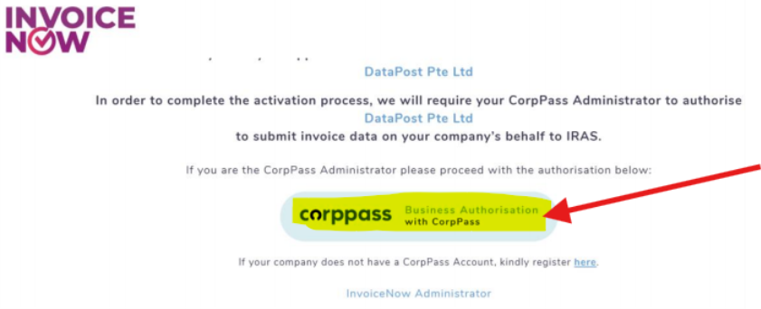
5.9. Scan the SingPass QR code using the SingPass app and complete the login process.
5.10. Next, Follow the on-screen instructions to complete the CorpPass authorization.
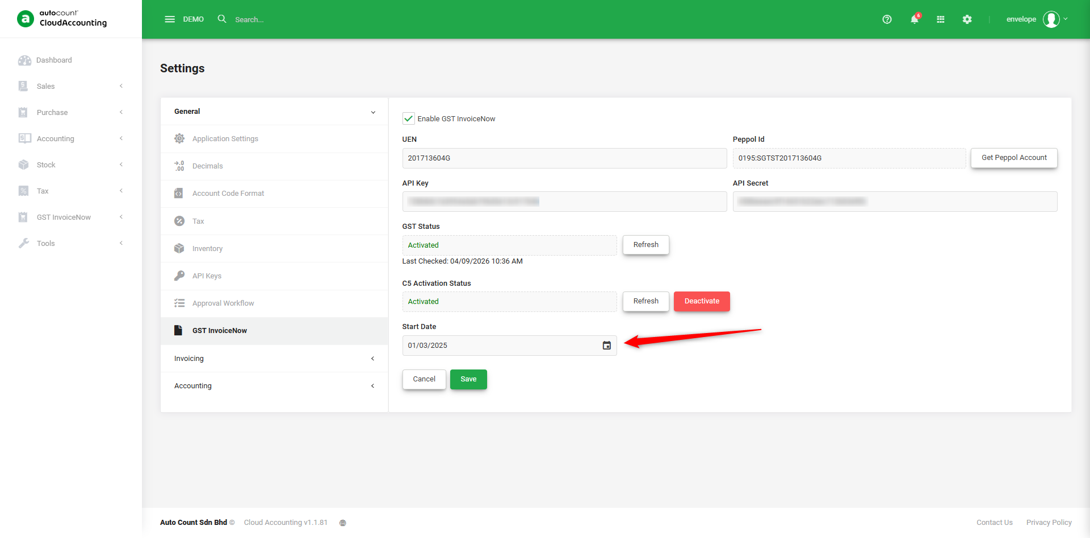
5.11. After the authorization is completed, the C5 Activation Status and GST Status will show as “Activated.” If it is not updated, click “Refresh” and check again.
5.12. Last but not least, enter your InvoiceNow Onboarding Date under Start Date and click “Save” to complete the setup.
You are done!
Prepared by Soon Horng, checked by Seck Voon & Stanley